Have you always wondered how you could bleach your hair at home without damaging it? Then this blog post is for you! Below we'll set out everything you need to know about bleaching your hair at home so that you can make sure you do it in the best way possible. Read on to find out what you need to know.
If you want to bleach your hair at home, it is possible—but it does require some skill, knowledge, and dedication. Bleaching your hair safely can be a tricky process and should not be taken lightly, so you will need to understand the process and invest in good-quality products. Also, make sure that you didn’t dye your hair just prior to bleaching. You wouldn’t want to
put bleach on pink hair.
Things That Are Important
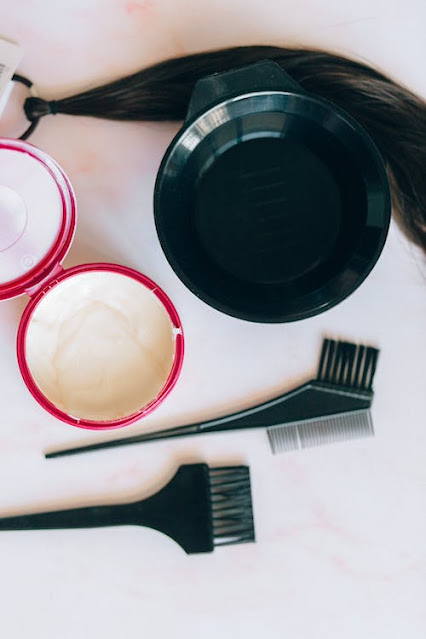
Before you start bleaching your hair make sure that you are prepared with the right products and tools. Investing in good quality bleaching powder, developer of 20 volume or above, gloves, a tint brush, an applicator bottle (or bowl if preferred) old towel or cape, and a deep conditioning treatment mask will ensure that you cover all the bases for everything that is needed when bleaching your hair at home.
It is also important to check the condition of your hair before beginning any sort of coloring or bleaching process as this could positively affect its ability to take on color or lighten up easily. If your hair is damaged then consider using treatments like protein packs and oils before attempting any form of the chemical process like bleaching on it; otherwise, the results may not turn out as desired as well as potentially cause damage.
Once you have all the materials ready, set aside any necessary time needed to get started – because although sometimes basic highlights can be achieved in one sitting, more extensive highlighting will likely require multiple sessions over several days (for most people around 4-5 sittings).
The amount of time depends on what kind of look you are going for - whether just a few subtle highlights here and there or something bolder such as ombre/ balayage – so assess what kind of look you want beforehand in order to allow enough time for each session accordingly. It’s better to spread out these sessions over several days than attempt it all in one go!
How to Bleach Hair - A Step-by-Step Process
Step 1: Divide your hair into sections
You need to separate the hair into sections so that you can make sure you bleach each section evenly. Make use of small clips to separate the hair into sections.
Step 2: Put on some old clothes
Put on some old clothes so that you don't ruin your better clothes while bleaching your hair.
Step 3: Mix the bleach and developer
Mix together equal parts by weight (not volume!) between two bowls: bleach powder & developer creme into an even consistency - making sure there aren't any lumps present before application onto the desired area(s).
Make sure to wear gloves throughout this whole process as direct contact between skin & product must be avoided due to its strong potency!
Step 4: Comb through the sections
Once mixed evenly use either an applicator bottle brush or comb to comb through the hair sections you made earlier. Avoid overlapping sections where possible but if doing so please make sure they have been completely rinsed clean prior to commencing another section being treated with a bleach mixture.
Step 5: Let the magic happen
Sit back and let the magic. The only thing you have to do now is wait until the bleach has done its job!
Keep in mind that leaving too much product on for long periods of time may cause severe damage whereas not leaving product long enough won't give much effect at all; approximate times range anywhere from 10 minutes up to 45 depending upon desired effect/ shade /original base color.
Step 6: Rinse off
After the recommended time is over you can rinse off the bleach in your hair gently by using warm water but avoid a full shampoo wash.
You can however make use of a deep conditioning treatment mask to make sure that the cuticle closes properly. This way you can protect the integrity and structural stability of your hair's natural moisture balance, strength, and thickness.
Step 7: Use a toner (optional)
If you do not want any warm tones in your hair you can bleach it with a toner. It may sound weird, but you can replace the bleach that you would normally bleach with and use the toner instead. Just follow the steps listed above but just swap out one for the other. This will ensure you don't get warm tones in your hair.
Aftercare of Your Bleached Hair
After you've bleached your hair, it's time for some aftercare. Here are a few key things you should think about:
1) Follow up with a moisturizing product to protect hair strands against outside sources such as heat, UV radiation, dirt, etc.
2) Wash your hair less often because, after the bleaching process, your hair will be more susceptible to breakage in the first couple of weeks.
3) Use a hair mask so that your hair can repair itself. Get a hair mask once a week for the first couple of weeks. Concentrate on the hair ends because they need the most love.
4) Skip the heat styling because you don't want to do any more damage to your hair. If you're using hot tools (like a curling or straightening iron) you expose your dry, vulnerable strands to even more damage. Letting your newly bleached hair air-dry is the best thing you can do.
Conclusion
Bleaching hair at home can seem intimidating—but if done safely and correctly by following these steps there's no reason why amazing results cannot be achieved! You can certainly bleach or
color your hair without mistakes.


No comments:
Ask your question here